Pharos Popup 9.0.10 for Mac OS X
Quick Start
- Log in as an administrator and run the Popup installer to install Popup on your Mac OS X computers.

- On each computer, use the Mac OS X Printer Setup Utility to add Popup printer queues.
- The latest Mac Popup updates can be obtained from the Pharos Community website.
Requirements
Pharos Popup for Mac OS X has the following requirements:
- Mac OS X 64-bit version 10.7, 10.8, 10.9, 10.10, 10.11, 10.12 and 10.13.
- Version Uniprint 8.2 or later server components. This update has been tested against Uniprint 8.2, 8.3, 8.4, 9.0, 9.0 R2 and 9.1. It is expected that this version will also work with 8.1 and earlier, however this has not been officially tested.
Installing Popup
To install Popup, obtain the Popup installer and run it:
- Obtain the file Popup.dmg from Pharos Systems.
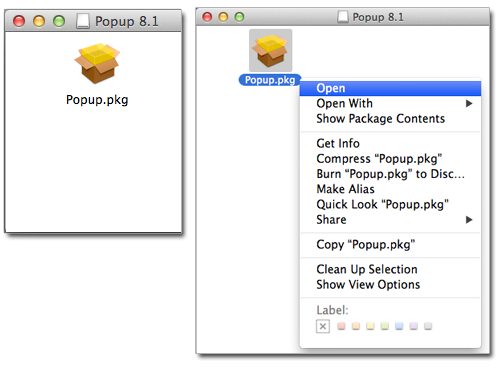
- Double-click this file to create a new disk image in Finder. This disk contains the Popup installer, Popup.pkg.
- Double-click the installer to run it. You may be requested to authenticate yourself as an administrator.
- Select a destination disk. You will only be able to select the startup disk.
- Click Install (or Upgrade). The installer automatically installs Popup and required support files.
Pharos Popup will now be running on the computer and will be automatically launched every time a user logs in.
Configuring Printers
To start using Popup for Mac OS X, add Popup printer queues on the computer:
- Open System Preferences and click on the Printers & Scanners icon.
- Click the + button.
- Hold down the Control key on the keyboard and click anywhere on the toolbar. From the popup menu that appears, select Customize Toolbar...
- Drag the Advanced icon to the toolbar and close the customization dialog.
- Click on the Advanced button in the toolbar.
- From the Type popup button, select Pharos Print Server.
- In the URL field, enter the URL for the desired Popup queue on a Pharos Print Server. This value should have the format “popup://print_server_address/queue_name”. The “print_server_address” should be replaced with the domain name or IP address of the Pharos Print Server. The “queue_name” should be replaced with the name of the desired queue on the Pharos Print Server. If a Print Server has the host name “PharosServer” and a Popup queue named “MacQueue”, the device URL should be “popup://PharosServer/MacQueue”.
- In the Name field, enter a name for the new printer queue. This is the name that will be shown to users on the computer.
- From the Use popup button, select the type of printer associated with the Popup queue. If the desired printer is not available, selecting “Generic PostScript Printer” will work in most cases.
- Click Add. The new Popup queue will now show up in the list of printers.
- To print to the new queue, select it from the printer popup button in the print dialog of any application.
Removing Popup
To remove Popup from a computer, run the Pharos Uninstaller:
- Launch the Uninstaller application in /Library/Application Support/Pharos/Utilities.
- Select Pharos Popup and any other Pharos components that you would like to uninstall, then click Continue.
- A list of the selected items will be shown. Click Continue.
- Type in an administrator user name and password when required to do so. The selected components will be removed from the computer.
Notes
If there are printers on the network that support Apple’s Bonjour technology, users may be able to bypass the Pharos printing system. To avoid this problem, disable the Bonjour features of any such printers.
If the software firewall (ipfw) on the computer is active, the following ports must be opened for TCP traffic for Popup to work:
- 515
- 28203
The firewall in Mac OS X is disabled by default. If it has not been manually activated, these ports will already be open.